In this modern and digital era, storytelling and comparison videos have become increasingly popular across social media platforms. They allow content creators to engage their audience by presenting narratives or comparing different aspects effectively. CapCut, a free online video editor, offers a range of split-screen effects that can be used to elevate the impact of such videos. In this article, we will explore CapCut’s split-screen effects and provide a step-by-step guide on how to incorporate them into your videos for dynamic storytelling and comparison purposes.
Let’s Dive In:
CapCut’s Split-Screen Effects
• Side by Side: The Side by Side effect divides the screen into two equal halves, displaying two videos or images side by side. It’s perfect for comparing two different scenes or showcasing before-and-after shots. Users can adjust the size and position of each split to create the desired composition.
• Picture-in-Picture (PiP): The Picture-in-Picture effect enables users to overlay a smaller video or image on top of the main video. This effect is commonly used for tutorials, reaction videos, or vlogs, where the smaller window displays the content creator’s face or additional footage while the main video plays. CapCut allows users to resize and reposition the PiP window to customize the layout.
• Vertical Split: The Vertical Split effect divides the screen vertically, creating two separate sections for videos or images. It’s particularly useful for displaying different perspectives simultaneously, such as showing both the interior and exterior views of a location or presenting two related scenes side by side.
• Horizontal Split: Similar to the Vertical Split effect, the Horizontal Split effect splits the screen horizontally. It’s effective for showcasing complementary visuals, like displaying a video clip above and its corresponding audio waveform below. Users can adjust the size and positioning of each split to achieve the desired effect.
• Diagonal Split: The Diagonal Split effect splits the screen diagonally, providing an intriguing visual division. This effect can be used creatively to juxtapose two contrasting elements or to show a gradual transition between two scenes. CapCut allows users to customize the angle and position of the diagonal split line.
• Grid Split: The Grid Split effect divides the screen into multiple sections, creating a grid-like layout for displaying various videos or images simultaneously. Users can choose from different grid patterns, such as 2×2 or 3×3, to accommodate their content. This effect is great for showcasing multiple perspectives, reactions, or a collage of related visuals.
Attributes of CapCut’s Split Screen Effects

• Easy-to-use Interface: The split screen feature in CapCut provides a user-friendly interface that allows users to effortlessly incorporate multiple video clips into a single frame.
• Customizable Layouts: Users have the flexibility to choose from a variety of split-screen layouts, such as side-by-side, top-and-bottom, or custom configurations. This allows for creative freedom and the ability to tailor the layout to suit the specific video’s content.
• Adjustable Screen Ratio: CapCut enables users to adjust the screen ratio of each split screen segment. This attribute is particularly useful when working with videos shot in different aspect ratios, ensuring that the combined video maintains a balanced and visually appealing composition.
• Transition Effects: CapCut offers a wide range of transition effects specifically designed for split-screen videos. These effects help smoothen the visual transition between different segments and enhance the overall flow of the video.
• Layer Management: CapCut allows users to easily manage and arrange the layers of each video segment in the split screen. This feature enables precise control over the order and positioning of the clips, making it easier to achieve the desired visual arrangement.
• Video Editing Tools: CapCut’s split-screen feature incorporates a comprehensive set of video editing tools. Users can adjust brightness, contrast, and saturation parameters and apply filters or color grading to individual segments. These tools ensure that each video clip within the split screen is visually consistent and polished.
• Audio Integration: CapCut enables users to merge the audio tracks of multiple videos in the split screen, creating a seamless audio experience. Additionally, users can adjust the volume levels of individual clips or add background music to enhance the overall impact of the video.
• Real-time Preview: CapCut provides a real-time preview feature for split-screen videos, allowing users to see the changes they make instantly. This attribute is invaluable for fine-tuning the arrangement, transitions, and overall visual impact of the split screen composition.
Step-by-Step Guide: Incorporating CapCut’s Split-Screen Effects for Dynamic Storytelling or Comparison Videos
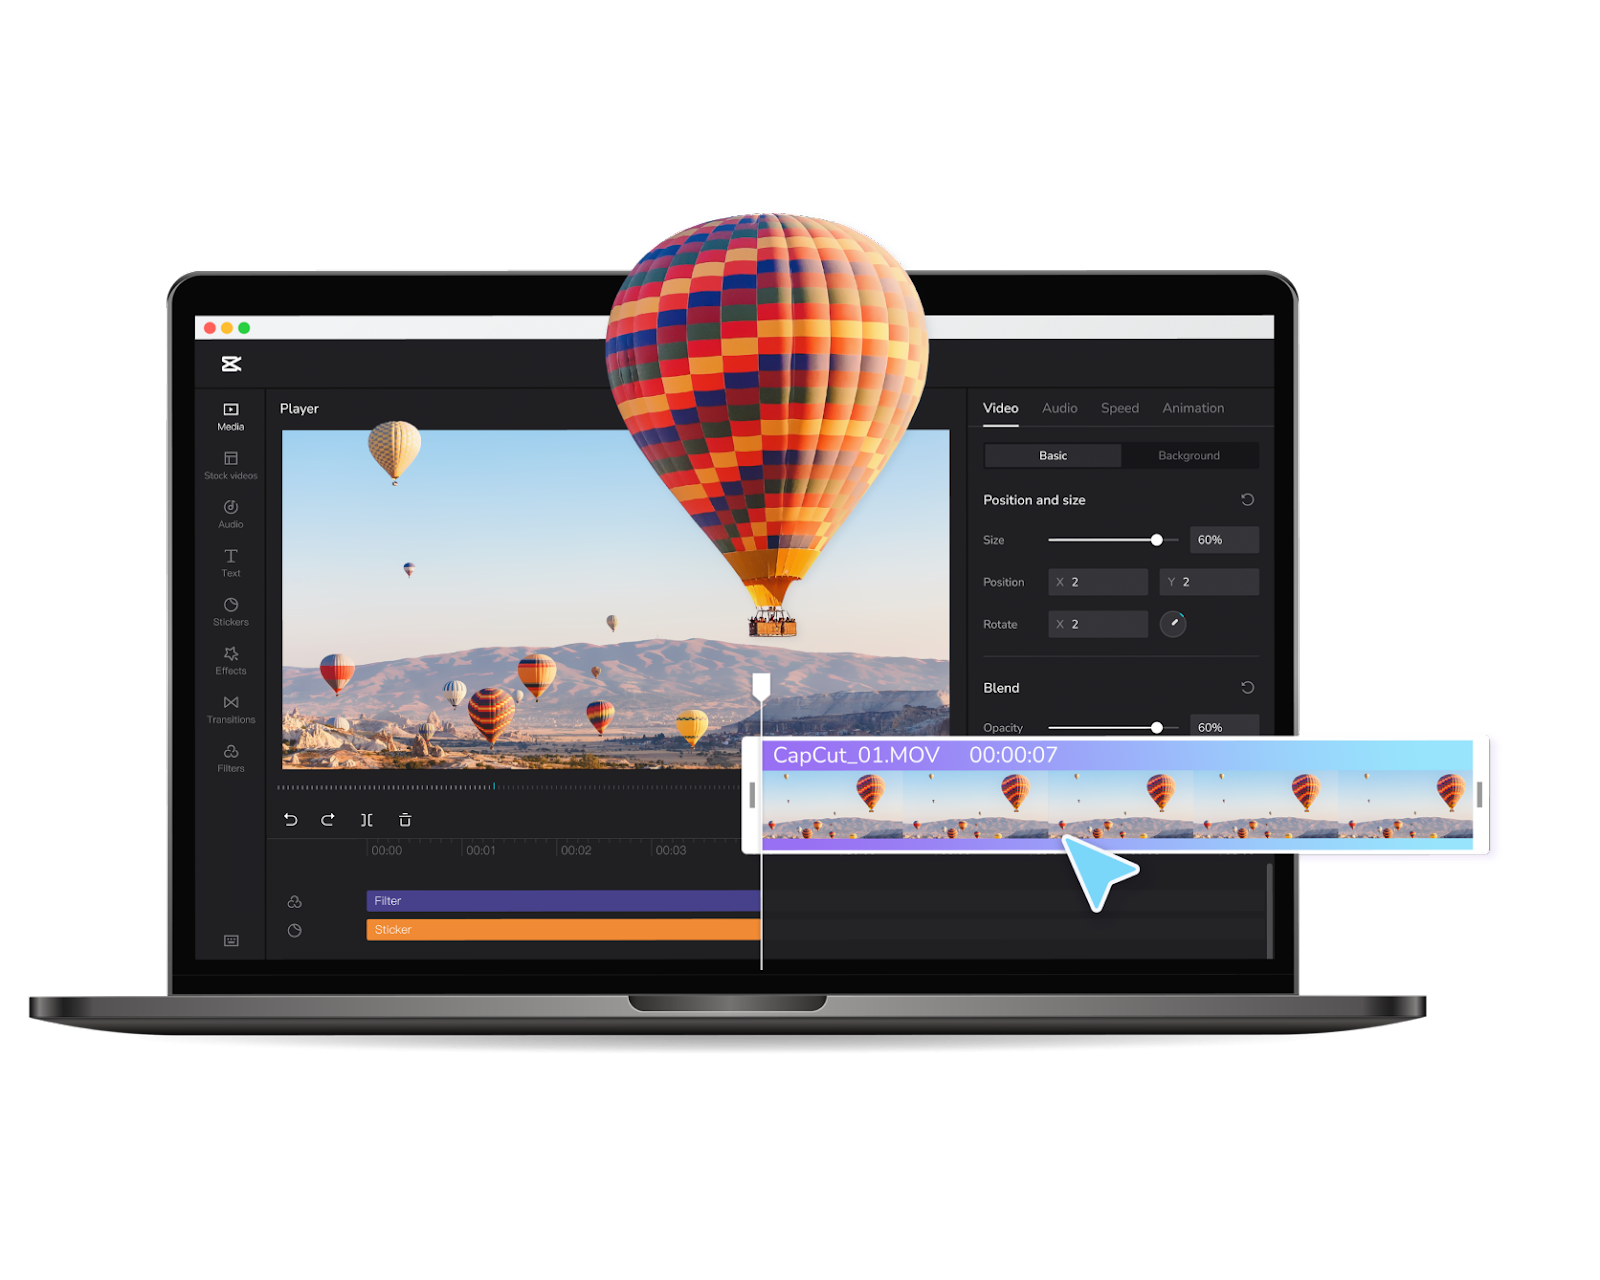
Step 1: Upload and Arrange Clips
Import the video clips or images you want to include in your split-screen video into the CapCut media library. Arrange the clips in the desired order on the timeline to create a cohesive narrative or comparison sequence.
Step 2: Choose a Split-Screen Effect
Select the clip or image where you want to apply a split-screen effect. Tap on the “Effects” button and navigate to the “Split-Screen” category. Explore the different split-screen effects available, such as Side by Side, Picture in Picture, Split Diagonal, or Mirror.
Step 3: Adjust Split-Screen Settings
Once you’ve chosen a split-screen effect, customize its settings to fit your desired outcome. You can adjust the size and position of the split-screen elements, as well as modify the duration and transition effects between the screens. Experiment with different settings to find the perfect balance for your storytelling or comparison video.
Step 4: Add Transitions and Effects
To enhance the visual appeal of your split-screen video, consider adding transitions and effects. CapCut provides a range of transitions, such as fades, wipes, and slides, which can help smooth the transition between split-screen frames. Additionally, you can apply filters, overlays, or text to further emphasize certain elements or provide context.
Step 5: Fine-Tune and Preview
Review your split-screen video to ensure it effectively communicates your intended narrative or comparison. Use the playback feature in CapCut to preview the video and make any necessary adjustments. Fine-tune the split-screen elements, transitions, and effects until you achieve the desired visual impact. Use the video BG remover to refine your video’s background.
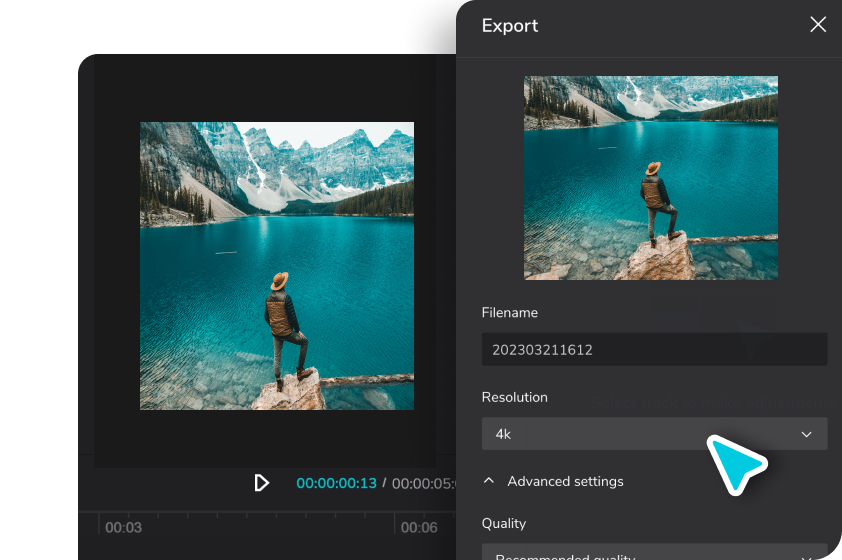
Step 6: Export and Share
Once you are satisfied with your split-screen video, export it in the desired format and quality settings. CapCut offers various export options, including resolution, aspect ratio, and file size. After exporting, share your dynamic storytelling or comparison video on social media platforms or any other desired channels to engage and captivate your audience.
Conclusion
CapCut’s split-screen effects provide an excellent way to enhance dynamic storytelling and comparison videos. By incorporating Side by Side, Picture in Picture, Split Diagonal, or Mirror effects, content creators can engage their audience and convey narratives or comparisons in a visually compelling manner. Follow the step-by-step guide outlined in this article to leverage CapCut’s powerful features and unleash your creativity. So, get ready to captivate your audience with stunning split-screen videos that leave a lasting impression.
Capture all your special memories with these ShaadiWish-approved best photographers.


Comments are closed.